


DIY: How to coat your ute tub to protect it from damage. This process can be done with most spray-in type liners such as bully liner or raptor coating.

1. First Step
Calculate the amount you need. Here we have used Raptor Coating, and they suggest around 3L per ute tub.
Work out the style - either 'over rail' or 'under rail'. Over rail protects the top of the tub sides, but is also slightly harder to mask up.

2. Prep the tub
Remove all tie-downs, ton covers, sports bars, and other items such as 12V sockets, etc. Wash the tub with detergent and rinse. Fill any holes around the tub with Sikaflex or silicone to fully water & dust proof it.

3. Sanding
The clear coat on the paintwork needs to be sanded back to allow the Coating to bond with the paint. 80 grit sandpaper works well to remove the clear coat and scuff the paint. Ensure that you don't go right through to the bare metal. Any places that bare metal is showing should be coated with etch primer.

4. Cleaning

Remove all sanding dust with an air compressor. Use a vacuum cleaner to remove any dust that remains.
Wash the tub thoroughly with a pressure blaster and detergent to clean from all dust and oils.
5. Location
Move the vehicle into an area with at least 3-5m clearance around the tub to avoid getting overspray on anything. Outdoors is fine as long as there isn't a lot of dust in the air.
6. Masking

Cover the entire cab in paint drop sheets (these heavy-duty plastic sheets from Bunnings are perfect). Cover the sides and tape to the desired location (over or under rail). We suggest using Knifeless Tape to tape the edge over rail applications, which will help define a sharp edge.
Ensure masking is done thoroughly as the Coating will be very hard to clean if it gets onto anything it shouldn't
7. Surface prep
One final preparation task is to wipe the tub down with Wax & Grease Remover. This helps the Coating and paint bond better.
8. The spray job

Connect up your air compressor and mix the hardener into the bottle. Shake the bottle as indicated in the instructions. Test out the spray on some cardboard first before spraying the vehicle.
When spraying into the tub, begin with the hard-to-reach areas such as behind the wheel arches. Use even sweeping strokes to ensure even coverage.
Between bottles, inspect the area closely to identify any parts that need attention.
9. De-masking
Remove all the drop sheets from the vehicle and masking tape. Pull the thread from the knifeless tape to create the clean edge (if used)
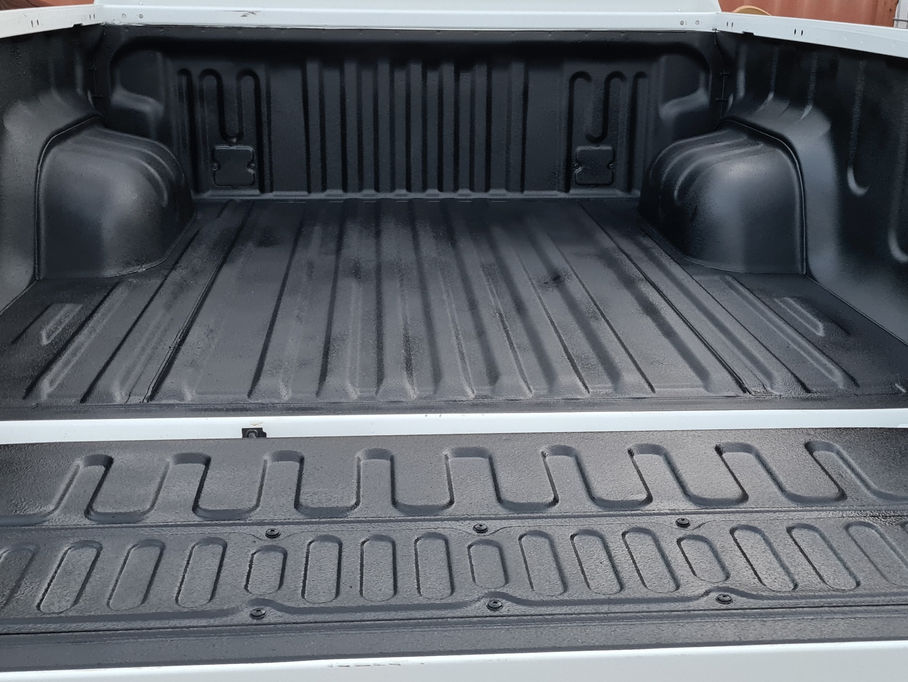
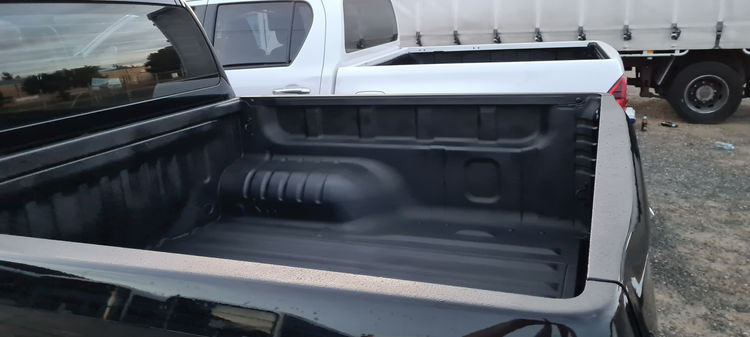
10. Completion

With the spray job now complete, leave the vehicle 24hrs to allow the Coating to cure (the vehicle can be driven, just avoid bumpy drives that may cause the body to twist). When cured, reattach all accessories removed in step 2. Job done!
The coating can be touched up in the future if it gets damaged. Raptor have these 1L aerosol cans which are perfect for touch up jobs.